Android開発をしていて、画面上で少し複雑な構造を動的に追加していくと、要素の階層構造を取得したくなることがあります。
今回は画面上に表示されている要素の階層構造を取得するプログラムを作成してみます。
やりたいことは、次のような画面で、「追加」ボタンを押す度に赤枠部分が動的に追加され、その都度、要素の階層構造をログに表示することです。

追加される要素群には、テキストフィールド、ラジオボタン、チェックボックスを設けました。
まず、string.xmlで画面文言を定義。
<resources>
    <string name="app_name">NestLayoutSample</string>
    <string name="header_message">ボタンを押すと要素グループを追加します</string>
    <string name="etName">お名前</string>
    <string name="cb_train">電車</string>
    <string name="cb_car">バス</string>
    <string name="cb_plane">飛行機</string>
    <string name="rb_male">男</string>
    <string name="rb_female">女</string>
    <string name="bt_add">追加</string>
</resources>
次にメインのレイアウトを定義します。
<LinearLayout
    xmlns:android="http://schemas.android.com/apk/res/android"
    android:layout_width="match_parent"
    android:layout_height="match_parent"
    android:orientation="vertical">

    <TextView
        android:id="@+id/et_Title"
        android:layout_width="wrap_content"
        android:layout_height="wrap_content"
        android:text="@string/header_message"
        android:textSize="20dp"/>

    <View
        android:layout_width="fill_parent"
        android:layout_height="1dp"
        android:background="@android:color/darker_gray"/>

    <ScrollView
        android:id="@+id/scrollView"
        android:layout_width="match_parent"
        android:layout_height="match_parent"
        android:layout_marginTop="32dp">

        <LinearLayout
            android:id="@+id/root"
            android:layout_width="match_parent"
            android:layout_height="wrap_content"
            android:orientation="vertical">

            <Button
                android:id="@+id/button"
                android:layout_width="wrap_content"
                android:layout_height="wrap_content"
                android:text="@string/bt_add" />

        </LinearLayout>
    </ScrollView>

</LinearLayout>
そして「追加」ボタンを押す度に追加される要素群を、別のレイアウトxmlで定義します。
<?xml version="1.0" encoding="utf-8"?>
<LinearLayout xmlns:android="http://schemas.android.com/apk/res/android"
    android:layout_width="match_parent"
    android:layout_height="match_parent"
    android:orientation="vertical">

    <LinearLayout
        android:layout_width="match_parent"
        android:layout_height="wrap_content"
        android:orientation="horizontal">
        <TextView
            android:layout_width="wrap_content"
            android:layout_height="match_parent"
            android:textSize="15dp"
            android:text="@string/etName"/>
        <EditText
            android:layout_width="match_parent"
            android:layout_height="match_parent" />
    </LinearLayout>

    <LinearLayout
        android:layout_width="match_parent"
        android:layout_height="wrap_content"
        android:orientation="horizontal">
        <CheckBox
            android:layout_width="wrap_content"
            android:layout_height="wrap_content"
            android:textSize="15dp"
            android:text="@string/cb_train"/>
        <CheckBox
            android:layout_width="wrap_content"
            android:layout_height="wrap_content"
            android:textSize="15dp"
            android:text="@string/cb_car"/>
        <CheckBox
            android:layout_width="wrap_content"
            android:layout_height="wrap_content"
            android:textSize="15dp"
            android:text="@string/cb_plane"/>
    </LinearLayout>

    <LinearLayout
        android:layout_width="match_parent"
        android:layout_height="wrap_content"
        android:orientation="horizontal">
        <RadioGroup
            android:layout_width="wrap_content"
            android:layout_height="wrap_content" />
        <RadioButton
            android:layout_width="wrap_content"
            android:layout_height="wrap_content"
            android:textSize="15dp"
            android:text="@string/rb_male"/>
        <RadioButton
            android:layout_width="wrap_content"
            android:layout_height="wrap_content"
            android:textSize="15dp"
            android:text="@string/rb_female"/>
    </LinearLayout>

    <View
        android:layout_width="match_parent"
        android:layout_height="1dp"
        android:background="@android:color/darker_gray"/>

</LinearLayout>
最後にActivityコード。Logcatに文字列が表示されるようにしています。
public class MainActivity extends AppCompatActivity {

    private LinearLayout rootView;
    private LayoutInflater inflater;

    @Override
    protected void onCreate(Bundle savedInstanceState) {
        super.onCreate(savedInstanceState);
        setContentView(R.layout.activity_main);

        rootView = findViewById(R.id.root);
        inflater = (LayoutInflater) getSystemService(Context.LAYOUT_INFLATER_SERVICE);

        Button b = findViewById(R.id.button);
        SampleListener sl = new SampleListener();
        b.setOnClickListener(sl);

    }

    private class SampleListener implements View.OnClickListener {

        @Override
        public void onClick(View view) {
            View subView = inflater.inflate(R.layout.sub, null);
            rootView.addView(subView, rootView.getChildCount() - 1);

            // Viewの階層構造を取得しLogに表示する
            StringBuilder sb = new StringBuilder();
            storeViewClassName(rootView, sb, "\t");
            Log.i(this.getClass().getName().toString() + "-->\n", "\n" + sb.toString());
        }

        // Viewの階層構造をStringBuilderに格納する
        private void storeViewClassName (View v, StringBuilder sb, String tab) {
            sb.append(tab).append(v.getClass().getSimpleName()).append("\n");
            if (v instanceof ViewGroup) {
                for (int i = 0; i < ((ViewGroup) v).getChildCount() ; i++) {
                    storeViewClassName(((ViewGroup) v).getChildAt(i), sb, tab + "\t");
                }
            }
        }
    }

}
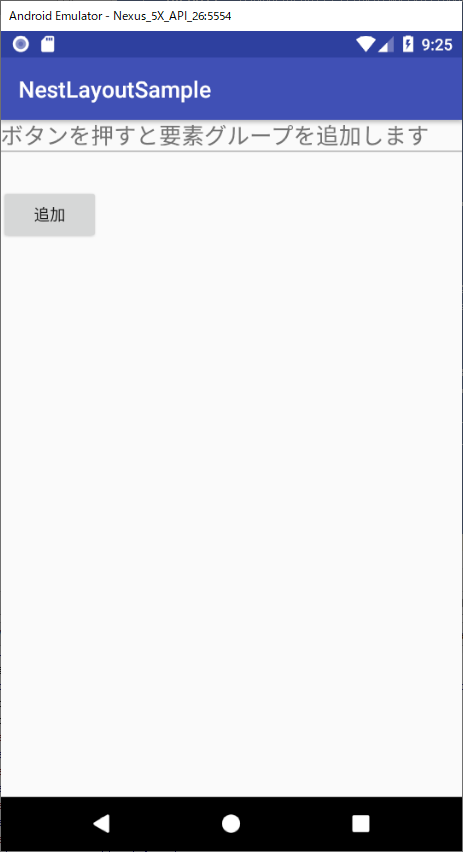
初期画面はこんな感じ。ここからスタートします。
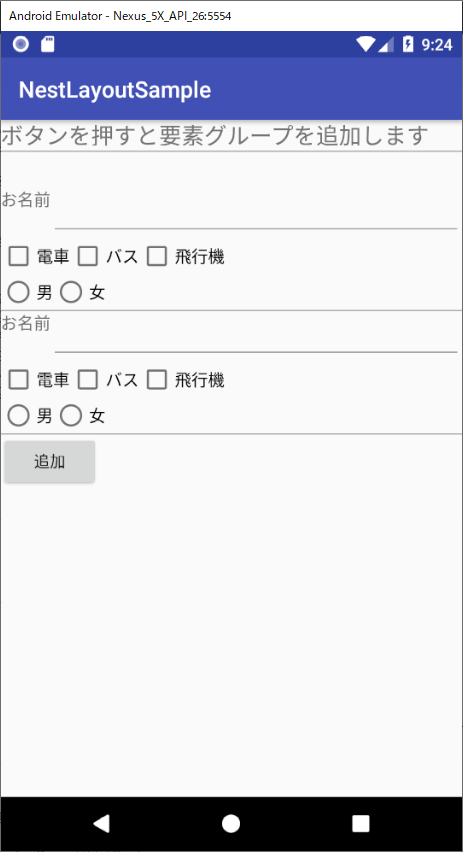
「追加」ボタンを一回押したとき。要素が追加されると共に、Logcatに要素名が表示されています。

    	LinearLayout
    		LinearLayout
    			LinearLayout
    				AppCompatTextView
    				AppCompatEditText
    			LinearLayout
    				AppCompatCheckBox
    				AppCompatCheckBox
    				AppCompatCheckBox
    			LinearLayout
    				RadioGroup
    				AppCompatRadioButton
    				AppCompatRadioButton
    			View
    		AppCompatButton
さらにもう一度「追加」ボタンを押すと、再度要素追加が行われ、Logcatに現れる階層構造も一つ増えています。
    	LinearLayout
    		LinearLayout
    			LinearLayout
    				AppCompatTextView
    				AppCompatEditText
    			LinearLayout
    				AppCompatCheckBox
    				AppCompatCheckBox
    				AppCompatCheckBox
    			LinearLayout
    				RadioGroup
    				AppCompatRadioButton
    				AppCompatRadioButton
    			View
    		LinearLayout
    			LinearLayout
    				AppCompatTextView
    				AppCompatEditText
    			LinearLayout
    				AppCompatCheckBox
    				AppCompatCheckBox
    				AppCompatCheckBox
    			LinearLayout
    				RadioGroup
    				AppCompatRadioButton
    				AppCompatRadioButton
    			View
    		AppCompatButton