Androidの開発を常時行っている方にはお馴染みだとは思いますが、
ときどき画面遷移の実装を忘れてしまう(!)ことがあるので、テンプレートを作ってみました。
今回作るのは次の機能。
内容は、シンプルに三枚の画面を順番に表示するというものです。
ボタンを押す度に「Activity1」→「Activity2」→「Activity3」と切り替わっていきます。
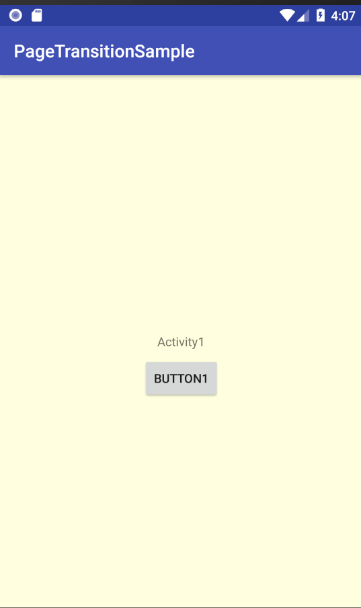
↓
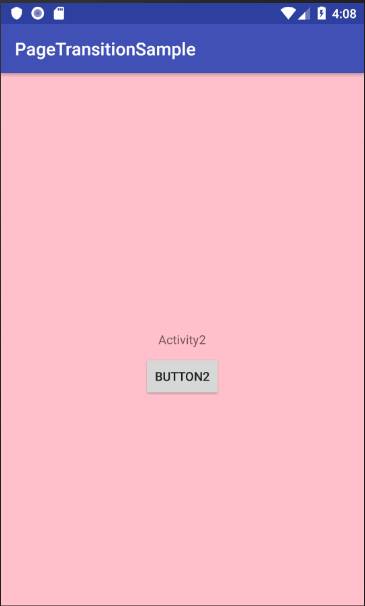
↓
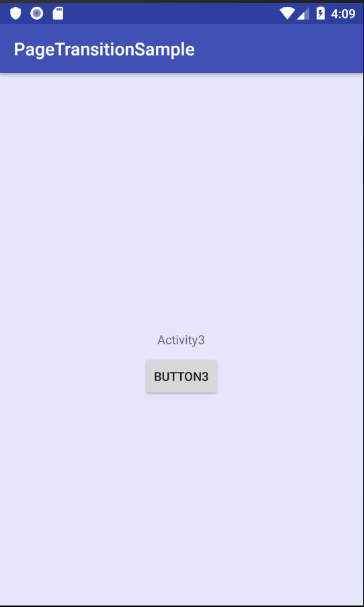
↓

↓
(以下同)
1番目の画面の実装
Empty Activity で最初のActivityを実装します。
まずはレイアウトxmlを定義。
<?xml version="1.0" encoding="utf-8"?>
<android.support.constraint.ConstraintLayout xmlns:android="http://schemas.android.com/apk/res/android"
    xmlns:app="http://schemas.android.com/apk/res-auto"
    xmlns:tools="http://schemas.android.com/tools"
    android:layout_width="match_parent"
    android:layout_height="match_parent"
    android:background="#ffffe0"
    tools:context=".Activity1">

    <TextView
        android:id="@+id/textView1"
        android:layout_width="wrap_content"
        android:layout_height="wrap_content"
        android:text="Activity1"
        app:layout_constraintBottom_toBottomOf="parent"
        app:layout_constraintLeft_toLeftOf="parent"
        app:layout_constraintRight_toRightOf="parent"
        app:layout_constraintTop_toTopOf="parent" />

    <Button
        android:id="@+id/button1"
        android:layout_width="wrap_content"
        android:layout_height="wrap_content"
        android:layout_marginEnd="8dp"
        android:layout_marginLeft="8dp"
        android:layout_marginRight="8dp"
        android:layout_marginStart="8dp"
        android:layout_marginTop="8dp"
        android:text="Button1"
        app:layout_constraintEnd_toEndOf="parent"
        app:layout_constraintStart_toStartOf="parent"
        app:layout_constraintTop_toBottomOf="@+id/textView1" />

</android.support.constraint.ConstraintLayout>
背景色で画面を判別し易いように、backgroundパラメータで#ffffe0を指定しています。
次にActivityクラスを実装します。
package com.example.pagetransitionsample;

import android.content.Intent;
import android.support.v7.app.AppCompatActivity;
import android.os.Bundle;
import android.view.View;
import android.widget.Button;

public class Activity1 extends AppCompatActivity {

    @Override
    protected void onCreate(Bundle savedInstanceState) {
        super.onCreate(savedInstanceState);
        setContentView(R.layout.activity_1);

        Button button = findViewById(R.id.button1);

        // 遷移元の画面からパラメータを受け取ることができる
        // Intent intent = getIntent();
        // String name1 = intent.getStringExtra("name1");
        // String name2 = intent.getStringExtra("name2");

        button.setOnClickListener(new ButtonClickListener());
    }

    private class ButtonClickListener implements View.OnClickListener {

        @Override
        public void onClick(View view) {
            Intent intent = new Intent(Activity1.this, Activity2.class);

            // 次の画面にパラメータを送ることができる
            // intent.putExtra("name1", value1);
            // intent.putExtra("name2", value2);

            startActivity(intent);

            finish(); // 画面遷移した後にこのActivityを終了する。
        }
    }
}
今後テンプレートとして使えるように、Intentクラスを使用した画面間のパラメータ引き渡し部分も記載しておきました。
今回は使用しないのでコメントアウトです。
2番目の画面の実装
2番目と3番目のコードは、1番目のものとほとんど同じ。違うのは細かい部品名や背景色ぐらいです。
プロジェクト右クリックでActivtyを追加すると、レイアウトxmlとActivityクラス双方のテンプレートが自動生成されます。
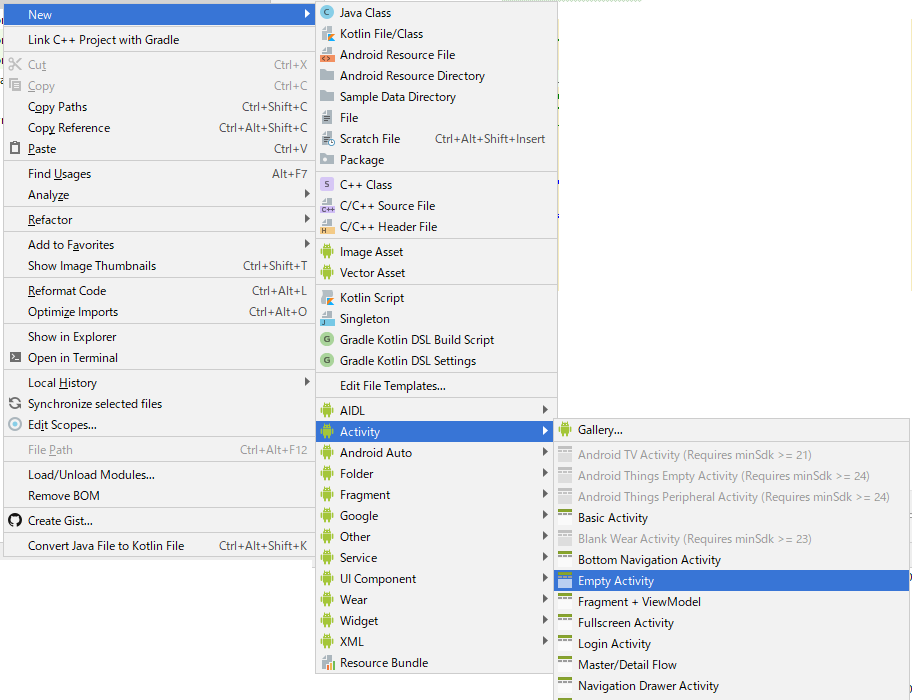
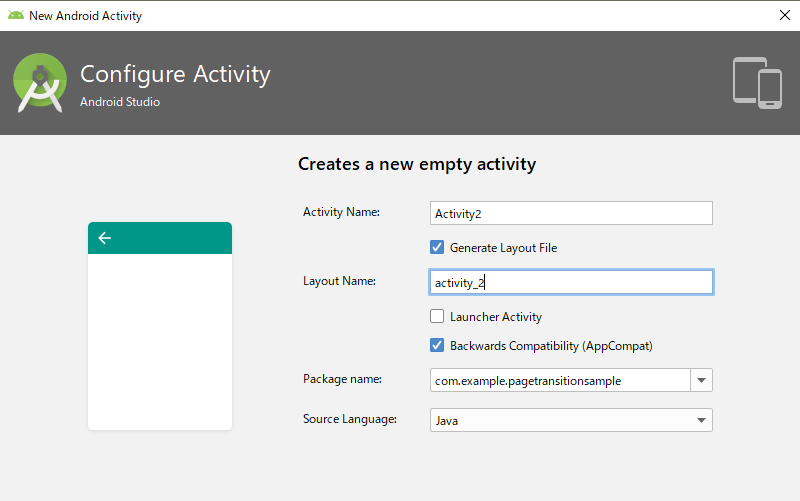
生成されたレイアウトファイルとActivityクラスを、1つ目のものと同様に書き換えていきます。
<?xml version="1.0" encoding="utf-8"?>
<android.support.constraint.ConstraintLayout xmlns:android="http://schemas.android.com/apk/res/android"
    xmlns:app="http://schemas.android.com/apk/res-auto"
    xmlns:tools="http://schemas.android.com/tools"
    android:layout_width="match_parent"
    android:layout_height="match_parent"
    android:background="#ffc0cb"
    tools:context=".Activity1">

    <TextView
        android:id="@+id/textView2"
        android:layout_width="wrap_content"
        android:layout_height="wrap_content"
        android:text="Activity2"
        app:layout_constraintBottom_toBottomOf="parent"
        app:layout_constraintLeft_toLeftOf="parent"
        app:layout_constraintRight_toRightOf="parent"
        app:layout_constraintTop_toTopOf="parent" />

    <Button
        android:id="@+id/button2"
        android:layout_width="wrap_content"
        android:layout_height="wrap_content"
        android:layout_marginEnd="8dp"
        android:layout_marginLeft="8dp"
        android:layout_marginRight="8dp"
        android:layout_marginStart="8dp"
        android:layout_marginTop="8dp"
        android:text="Button2"
        app:layout_constraintEnd_toEndOf="parent"
        app:layout_constraintStart_toStartOf="parent"
        app:layout_constraintTop_toBottomOf="@+id/textView2" />

</android.support.constraint.ConstraintLayout>
1つ目のレイアウトと異なるのは、ハイライトした部分だけです。
Activityクラスも同様。
package com.example.pagetransitionsample;

import android.content.Intent;
import android.support.v7.app.AppCompatActivity;
import android.os.Bundle;
import android.view.View;
import android.widget.Button;

public class Activity2 extends AppCompatActivity {

    @Override
    protected void onCreate(Bundle savedInstanceState) {
        super.onCreate(savedInstanceState);
        setContentView(R.layout.activity_2);
        Button button = findViewById(R.id.button2);

        // 遷移元の画面からパラメータを受け取ることができる
        // Intent intent = getIntent();
        // String name1 = intent.getStringExtra("name1");
        // String name2 = intent.getStringExtra("name2");

        button.setOnClickListener(new ButtonClickListener());
    }

    private class ButtonClickListener implements View.OnClickListener {

        @Override
        public void onClick(View view) {
            Intent intent = new Intent(Activity2.this, Activity3.class);

            // 次の画面にパラメータを送ることができる
            // intent.putExtra("name1", value1);
            // intent.putExtra("name2", value2);

            startActivity(intent);

            finish(); // 画面遷移した後にこのActivityを終了する。
        }
    }
}
3番目の画面の実装
最後に、3つ目の画面を実装していきます。2番目と同様、プロジェクトを右クリックして、レイアウトファイルとActivityクラスを生成し、それらを書き換えます。
レイアウトファイル。
<?xml version="1.0" encoding="utf-8"?>
<android.support.constraint.ConstraintLayout xmlns:android="http://schemas.android.com/apk/res/android"
    xmlns:app="http://schemas.android.com/apk/res-auto"
    xmlns:tools="http://schemas.android.com/tools"
    android:layout_width="match_parent"
    android:layout_height="match_parent"
    android:background="#e6e6fa"
    tools:context=".Activity1">

    <TextView
        android:id="@+id/textView3"
        android:layout_width="wrap_content"
        android:layout_height="wrap_content"
        android:text="Activity3"
        app:layout_constraintBottom_toBottomOf="parent"
        app:layout_constraintLeft_toLeftOf="parent"
        app:layout_constraintRight_toRightOf="parent"
        app:layout_constraintTop_toTopOf="parent" />

    <Button
        android:id="@+id/button3"
        android:layout_width="wrap_content"
        android:layout_height="wrap_content"
        android:layout_marginEnd="8dp"
        android:layout_marginLeft="8dp"
        android:layout_marginRight="8dp"
        android:layout_marginStart="8dp"
        android:layout_marginTop="8dp"
        android:text="Button3"
        app:layout_constraintEnd_toEndOf="parent"
        app:layout_constraintStart_toStartOf="parent"
        app:layout_constraintTop_toBottomOf="@+id/textView3" />

</android.support.constraint.ConstraintLayout>
Activityクラス。
package com.example.pagetransitionsample;

import android.content.Intent;
import android.support.v7.app.AppCompatActivity;
import android.os.Bundle;
import android.view.View;
import android.widget.Button;

public class Activity3 extends AppCompatActivity {

    @Override
    protected void onCreate(Bundle savedInstanceState) {
        super.onCreate(savedInstanceState);
        setContentView(R.layout.activity_3);
        Button button = findViewById(R.id.button3);

        // 遷移元の画面からパラメータを受け取ることができる
        // Intent intent = getIntent();
        // String name1 = intent.getStringExtra("name1");
        // String name2 = intent.getStringExtra("name2");

        button.setOnClickListener(new ButtonClickListener());
    }

    private class ButtonClickListener implements View.OnClickListener {

        @Override
        public void onClick(View view) {
            Intent intent = new Intent(Activity3.this, Activity1.class);

            // 次の画面にパラメータを送ることができる
            // intent.putExtra("name1", value1);
            // intent.putExtra("name2", value2);

            startActivity(intent);

            finish(); // 画面遷移した後にこのActivityを終了する。
        }
    }
}
AndroidManifest.xmlの確認
AndroidManifest.xmlにActivityの登録が必要となりますが、AndroidプロジェクトからActivityを追加している場合は、自動的に登録されています。
次のように表示されているはず。
<?xml version="1.0" encoding="utf-8"?>
<manifest xmlns:android="http://schemas.android.com/apk/res/android"
    package="com.example.pagetransitionsample">

    <application
        android:allowBackup="true"
        android:icon="@mipmap/ic_launcher"
        android:label="@string/app_name"
        android:roundIcon="@mipmap/ic_launcher_round"
        android:supportsRtl="true"
        android:theme="@style/AppTheme">
        <activity android:name=".Activity1">
            <intent-filter>
                <action android:name="android.intent.action.MAIN" />

                <category android:name="android.intent.category.LAUNCHER" />
            </intent-filter>
        </activity>
        <activity android:name=".Activity2" />
        <activity android:name=".Activity3"></activity>
    </application>

</manifest>
あとはアプリケーションを実行すれば、冒頭の画面が表示されるはずです。
